
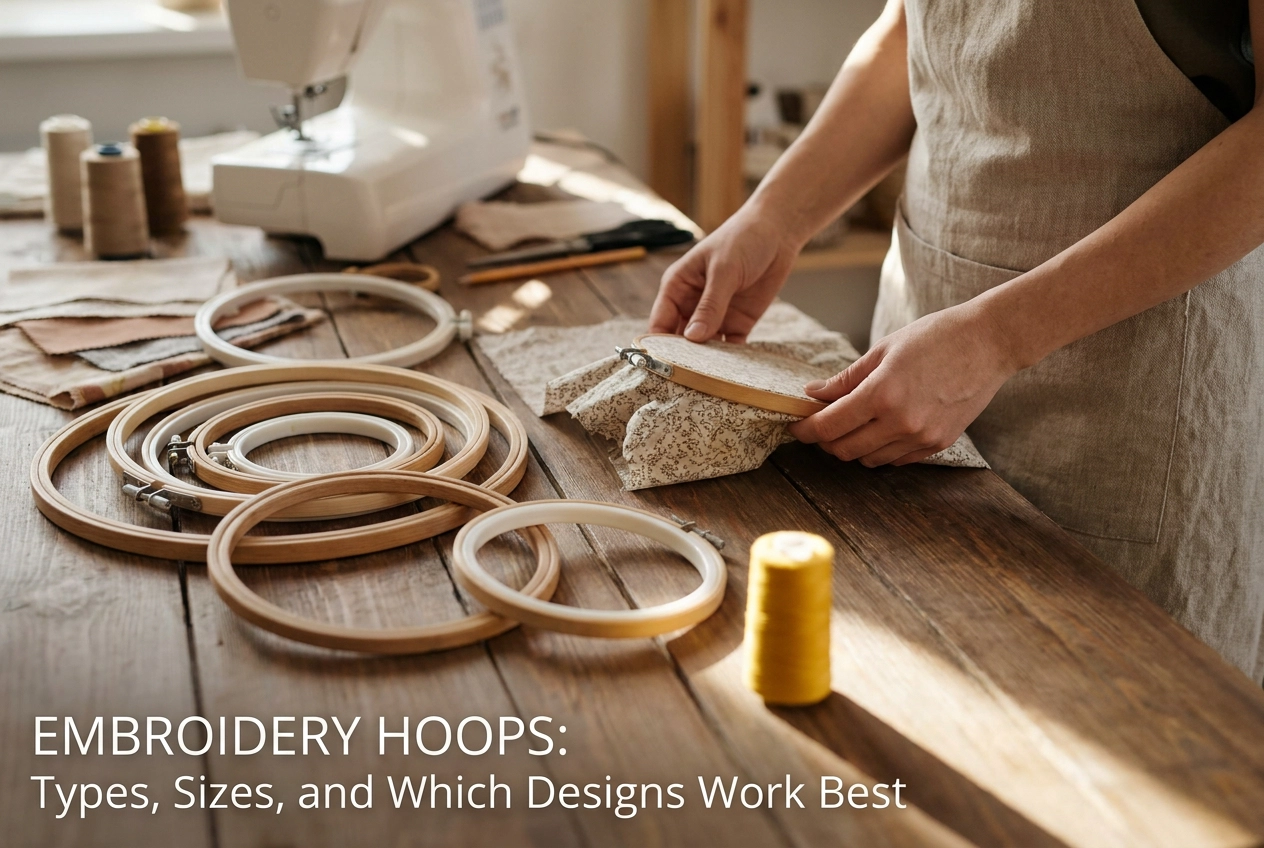
So you've decided to try embroidery, and now you're staring at a wall of circular frames at the craft store wondering which one you actually need. Trust me, we've all been there! Choosing the right embroidery hoop might seem like a small detail, but it can make a huge difference in how your stitching looks and feels as you work.
The good news? Once you understand the basics, picking the perfect hoop becomes second nature. Whether you're just getting started or trying to figure out why your fabric keeps slipping mid-stitch, this guide has you covered.
In this post, we're breaking down everything beginners need to know about the embroidery hoop, including the different types available, what all those sizes actually mean, and which designs pair best with each style. By the time you finish reading, you'll feel confident walking into any craft store and grabbing exactly what you need for your next project. Let's get into it!
Hoop Materials Explained: Wood, Plastic, Bamboo, and Metal
Not all embroidery hoops are created equal, and the material your hoop is made from matters more than most beginners realize. Before you stretch your first piece of fabric, it helps to understand what each material does well and where it falls short.
Wooden hoops are the most popular option on the market by a wide margin, holding a 42.3% share of the global embroidery hoop market. That dominance makes sense. Wood naturally grips fabric without over-tightening, making it ideal for hand embroidery, cross-stitch, and needlepoint projects. Most beginners gravitate toward wood because it feels intuitive to use and is widely available at craft stores. The screw-tension design gives you control over how tightly the fabric is held, which is a huge plus when you are still developing a feel for proper tension. Premium beechwood versions from brands like Nurge or Elbesee offer thicker construction and a noticeably heavier feel, though they tend to cost two to three times more than standard options.
Plastic hoops are another beginner-friendly choice, especially if budget and portability are priorities. They are lightweight, resistant to warping over time, and generally the most affordable hoops you can find. One practical advantage is that plastic inner and outer rings lock together rather than relying purely on friction, which makes them useful for punch needle work. Just keep in mind that this same locking mechanism can put extra stress on delicate fabrics, so save plastic hoops for sturdier materials like cotton fabric or aida cloth while you are learning.
Bamboo hoops deserve a mention of their own even though they are often sold simply as "wood" hoops. In fact, most of the inexpensive unfinished wood hoops you see in big-box craft stores are actually bamboo. Bamboo is slightly lighter than traditional hardwood and is a sustainably harvested material, which is a nice bonus for eco-conscious crafters. It grips lightweight fabrics like cotton muslin and linen really well, making it a solid everyday option for casual projects.
Metal hoops, including spring-tension and hinge-style varieties, are built for situations where fabric stability is non-negotiable. They are the go-to choice for machine embroidery because they maintain a rigid hold during high-speed stitching without shifting or loosening mid-project. Many metal hoops feature a felt strip along the inner ring to help grip fabric securely.
Choosing the wrong hoop material is one of the most common beginner mistakes and it is also one of the easiest to avoid. Using a rigid metal hoop on silk or a loosely fitting wood hoop on stretchy knit fabric can cause puckering, slipped tension, or hoop burn, which are those faint compression marks left behind on delicate textiles. A quick look at this practical guide to embroidery hoop types can help you match your hoop to your fabric before you commit to a project. Getting this pairing right from the start saves you fabric, frustration, and time.
Hoop Types: Traditional Screw, Magnetic, and Adjustable Tension
Now that you know what your hoop is made of, the next big question is how it actually works. The mechanism your embroidery hoop uses to hold fabric in place changes everything about your workflow, your results, and how much frustration you'll experience along the way.
1. Traditional Screw-Tightened Hoops
The screw-tightened hoop is what most people picture when they hear the words "embroidery hoop." It consists of two rings, one fitting inside the other, with a small screw on the outer ring that you tighten to clamp your fabric between them. This design has been around for generations, and for good reason: it's simple, inexpensive, and easy to find at any craft store. You can pick one up in wood, bamboo, or plastic depending on your preference and budget.
The main thing beginners need to watch out for is over-tightening. It's tempting to crank that screw as tight as possible thinking it'll keep your fabric more secure, but too much tension actually distorts the fabric grain, creates puckering, and can stretch delicate materials unevenly. The goal is snug, not bone-crushing. If you're working with lightweight cotton or linen, a gentle firm tightening is all you need. Hand embroidery hobbyists genuinely love this hoop style because the wooden or bamboo surface gives the fabric something to grip against, and that tactile control is hard to replicate with other materials.
2. Magnetic Hoops
Magnetic hoops are a completely different experience. Instead of wrestling an outer ring over an inner ring while trying not to shift your fabric, you simply lay your material flat, place one hoop half underneath, and snap the magnetic top half down over it. The embedded magnets do all the holding work for you. This sounds almost too easy, and honestly, for machine embroidery, it kind of is in the best possible way.
Machine embroiderers have embraced magnetic hoops enthusiastically because they solve one of the most tedious parts of the process: re-hooping. When you're working on a large multi-stitch design that requires repositioning, having to re-tension a screw hoop every single time adds up fast. Magnetic hoops snap back into consistent alignment, which keeps your design registration clean and reduces costly stitching errors. According to The Complete Guide to Choosing the Perfect Embroidery Hoop, magnetic hoops also reduce hoop burn and physical strain on your hands and wrists, which matters a lot during longer production sessions. What started as a premium specialty item has genuinely become a practical standard for anyone doing machine embroidery with any regularity.
One important note: the strong magnets in these hoops can interfere with pacemakers and other magnetic-sensitive medical devices, so be aware of that before purchasing.
3. Adjustable Tension Hoops
Adjustable tension hoops are the most underrated option in the category. Rather than committing to a fixed tightness or fully removing and reassembling your hoop, these designs include a dial, slider, or spring mechanism that lets you fine-tune grip on the fly. That flexibility is genuinely useful when you're working with multiple fabric weights in a single sitting, moving from a thick canvas section to a lightweight voile without stopping to swap equipment entirely.
Spring-loaded versions are especially handy because they apply consistent pressure automatically, removing the guesswork around "how tight is tight enough." According to the Ultimate Guide to Embroidery Hoops, having the right tension mechanism for your specific fabric type is one of the most practical decisions you can make early in your embroidery journey.
The bottom line is that your hoop type should match how you work. Hand embroiderers who value control and a slower, more intentional pace tend to stay loyal to screw-tightened wooden options. Machine embroiderers who prioritize speed, repeatability, and clean registration increasingly gravitate toward magnetic and spring-tension styles. Knowing the difference before you invest saves you the frustration of fighting your equipment instead of enjoying your project.
Embroidery Hoop Sizes: The Sizes You Will Actually Use
Once you understand how your hoop is built and how it locks fabric in place, the next thing that will immediately affect your projects is size. Embroidery hoop sizes are not interchangeable, and choosing the right one is less about preference and more about matching your physical hoop to the design file you want to stitch. Here is a practical breakdown of every size you will actually encounter.
The 4x4 Inch Hoop: Your Starting Point
The 4x4 inch hoop is where almost every beginner starts, and for good reason. It fits on virtually every home embroidery machine sold today, which means design file creators build heavily around this format. Small motifs like monograms, pocket logos, hat patches, and sleeve graphics all land comfortably inside a 4x4 field. If you are browsing downloadable designs and you are not sure what your machine can handle, files labeled 4x4 are your safest first purchases. The category is enormous, covering everything from simple floral accents to anime characters, school mascots, and sports emblems scaled specifically for this compact field.
The 5x7 Inch Hoop: Room to Breathe
Step up to a 5x7 inch hoop and your design options expand significantly. This is the size where full chest logos, children's character designs, sports team graphics, and nature motifs with multiple elements start to look the way they are meant to look. Many home machines include a 5x7 hoop as a standard accessory alongside the 4x4, so you may already own one without fully using it. According to Understanding Hoop Sizes In Machine Embroidery, this mid-range size is a core intermediate format that bridges compact single-element work and larger production runs. If you are personalizing apparel and want designs with visual presence, the 5x7 is where you will spend a lot of time.
The 6x10 and 8x12 Inch Hoops: Production-Level Efficiency
For makers who are working through larger projects or handling multiple pieces, the 6x10 and 8x12 inch hoops are where efficiency really kicks in. Full back panels, oversized floral compositions, multi-element sports graphics, and in-the-hoop bag projects all require this kind of field space. As the embroidery hoop size chart from bsewinn.com outlines, design files built for these dimensions are formatted specifically to those measurements. A file listed as 8x12 cannot be stitched in a smaller hoop without splitting the design across multiple hoopings or re-digitizing entirely.
Jumbo Hoops (12x17 Inches and Beyond)
Jumbo hoops at 12x17 inches and larger are no longer exclusive to commercial machines. Mid-range home machines increasingly support these formats, and the payoff is significant. Jacket backs, large tote bag panels, and full stadium-style team graphics that previously required careful re-hooping and manual realignment can now stitch in a single pass. That reduction in re-hooping saves time, reduces misalignment risk, and makes large-scale personalization projects genuinely practical for home crafters.
Why Hoop Size Is the Most Important Beginner Decision
Here is the thing that catches most beginners off guard: the hoop size listed in any downloadable embroidery design description is not a recommendation. It is the minimum hoop your machine must support to stitch that file as a single unit. According to Maggie Frames' machine embroidery hoop sizes guide, matching your hoop capability to your design file size is one of the most consequential decisions you will make as an embroiderer. Always check your machine's maximum hoop size before purchasing or downloading a design file.
A Catalog Built Across Every Size
The design library at Embroiderynsewing.com is organized to cover all of these size categories. Compact 4x4 motifs span categories like anime, cartoons, and school mascots. Mid-size 5x7 files cover character designs, florals, and team logos. And large-field sports and stadium designs built for 8x12 and larger hoops are available for makers who are ready to work bigger. Whatever size your machine supports, there are ready-to-stitch files waiting for it.
Machine Embroidery Hoops vs. Hand Embroidery Hoops: Key Differences
If you have ever browsed embroidery hoops at a craft store and felt confused about why some look so different from others, you are not alone. The short answer is that hand embroidery hoops and machine embroidery hoops are built for completely different jobs, and mixing them up will cause real problems for your projects.
Hand embroidery hoops are designed around the human hand. They are almost always round or oval, made from wood, bamboo, or plastic, and sized to sit comfortably in your palm while you stitch. Their main job is to keep fabric taut so your stitches stay even. They are passive tools; you hold them, they hold your fabric, and that is the full relationship.
Machine embroidery hoops work in a fundamentally different way. Instead of sitting in your hand, they physically attach to your embroidery machine's arm via a bracket system. Once locked in, the hoop travels with the machine's feed mechanism, moving the fabric precisely under the needle to place every stitch exactly where the digital design file calls for it. The hoop is not just holding fabric; it is an active mechanical component of the stitching process. You can learn more about how this system works in this machine embroidery hoops ultimate guide.
Because the hoop moves during stitching, stability is everything. If the fabric slips even slightly mid-project, your design will distort and the misalignment is often impossible to correct without starting over. This is why machine hoops use firm locking mechanisms rather than the simple tightening screws you find on hand hoops. For high-volume work, magnetic hoops vs traditional embroidery hoops is worth reading to understand how newer magnetic systems address exactly this stability concern.
Compatibility is the biggest practical difference for beginners buying their first additional hoops. Machine hoops must be precisely sized and configured for your specific machine model. They are not universal across brands, and they are not always interchangeable even across different machines from the same brand. Before purchasing any additional hoop, confirm that it explicitly lists your machine model as compatible.
One final difference worth knowing: hand embroidery hoops often become display frames after a project is finished, with the completed piece left stretched inside and hung as wall art. Machine hoops have no such second life. They are purely functional tools that live on your machine and nowhere else.
Hoop Compatibility by Machine Brand and Design File Format
Getting your hoop and your machine on the same page is one of those foundational steps that saves beginners a lot of frustration. The relationship between your machine brand, its native file format, and the hoop sizes it supports all work together, and understanding that connection upfront makes every design purchase more straightforward.
Brother Machines: The Most Beginner-Friendly Starting Point
Brother machines, including the popular PE800, PE900, and the advanced Luminaire series, run on .PES format design files as their native format, with .DST also widely accepted. What makes Brother such a common recommendation for beginners is that the standard 4x4 and 5x7 Brother hoops are among the most universally supported sizes across downloadable design catalogs. A 4x4 hoop is ideal for small logos, patches, and pocket designs. The 5x7 hoop opens up chest designs, sleeve art, and mid-sized decorative pieces. If you are buying your first machine and want the widest selection of ready-to-stitch design files, Brother's format compatibility is genuinely hard to beat.
Janome Machines: A Separate Ecosystem
Janome machines use .JEF format as their primary native file type, with some models also supporting .SEW format depending on the generation. Here is the thing that trips up a lot of beginners: Janome hoops follow a completely separate bracket attachment system from Brother, so the physical hoops are not interchangeable between brands. On the file side, a design saved as .PES for a Brother 5x7 hoop will not simply run on a Janome machine. You would need to convert that file from .PES to .JEF first. This is format conversion, which is a different process from digitizing. Converting an existing stitch file to a new format preserves the stitch data; it just repackages it so your machine can read it.
Singer and Bernina: Confirm Before You Buy
Singer machines use .XXX format and Bernina machines use .EXP format, each with their own proprietary hoop attachment systems that are not compatible with other brands. The practical takeaway for beginners is simple: confirm your machine's native file format before you purchase any downloadable design pack. Check your manual or the manufacturer's website, note the exact format name, and use that as your filter when shopping.
The Smart Workflow and Why Multi-Format Packs Solve Everything
The practical workflow comes down to four steps. Identify your machine brand, note its native file format, confirm which hoop sizes your machine supports, then match your design purchases to those specs. The good news is that most quality downloadable design files are sold as multi-format packs that include .PES, .DST, .JEF, and .EXP together, meaning you buy once and use on any machine you own.
That is exactly how the design files at Embroidery n Sewing work. Every design in the catalog is available in all major formats, so whether you are stitching on a Brother, Janome, Bernina, or Singer, you can shop the full library and download the version that matches your machine without any extra steps or format hunting.
What Is Re-Hooping and How Do You Minimize It
Re-hooping is exactly what it sounds like: you remove your fabric from the embroidery hoop, reposition it to a new area, and re-secure it so your machine can continue stitching a design that extends beyond the boundaries of a single hoop field. If you have ever worked on a large jacket back, a team uniform, or a wide banner design, you have probably encountered this situation. It is one of the most consistently mentioned frustrations among embroiderers at every skill level, from weekend hobbyists to people running small production operations out of their homes.
The biggest problem with re-hooping is not the extra time it takes. It is the alignment risk that comes with every single repositioning. Even a shift of just a few millimeters between your first and second hooping can create a visible gap or an awkward seam right in the middle of your finished design. This becomes especially obvious on structured garments like polo shirts, baseball jackets, and fitted hats, where the fabric has less give and any misalignment shows immediately. As one community discussion among beginner embroiderers confirmed, gaps between split designs appear even when measurements look correct on paper, partly because fabric draws in slightly during the first round of stitching. Compensating by overlapping your second alignment by about 1mm to 2mm over the first, rather than placing segments perfectly edge-to-edge, can help account for that draw-in.
The most practical way to reduce how often you re-hoop is to use the largest hoop your machine supports for every project. This is not just a convenience tip; it is the reason large hoop formats of 8x12 inches and above have shifted from being premium add-ons to standard expectations on modern home embroidery machines. Larger hoop fields let you stitch bigger designs in a single pass without ever needing to reposition. Check your machine's maximum hoop field before purchasing designs, and always match your design dimensions to that measurement first.
When you are browsing downloadable design files for big projects, always check the listed stitch dimensions before you buy. A design file built for a large hoop field eliminates the need for splitting entirely. For something like a full team uniform chest logo or a custom jacket back, look specifically for files sized to fit within your machine's maximum field. This is a quick filter that saves a lot of frustration later. You can find design dimensions listed alongside each file in well-organized digital catalogs, so it takes only seconds to confirm compatibility.
If re-hooping truly cannot be avoided for an oversized project, prioritize design files that include registration marks or alignment guides built directly into the file. These are small markers stitched into the design that give you a visible reference point when you reposition your fabric for the next hooping. Files with this feature make accurate repositioning significantly easier and reduce the chance of visible seams. It is a detail worth checking during design selection, not as an afterthought once you are already mid-project and hoping for the best.
In-the-Hoop Designs: A Project Category Worth Knowing About
If you thought embroidery hoops were only for decorating the front of a shirt or adding a monogram to a tote bag, in-the-hoop design is about to change how you think about your machine entirely. ITH is a project category where the embroidery machine does not just stitch a design onto fabric; it actually builds a complete, functional item from start to finish while everything stays secured inside the hoop. The machine's stitch sequence layers materials, joins edges, and closes seams in a specific order so that when the hoop comes off the machine, you have a finished product ready to use or gift.
What Gets Made In-the-Hoop
The variety of ITH projects is genuinely impressive, especially for beginners who are just realizing their machine can do more than appliqué. Popular project types include zippered bags, coin pouches, keychains, baby bibs, bookmarks, stuffed ornaments, and key fobs. You can browse active categories like in-the-hoop bags and embroidery designs or explore options like in-the-hoop backpack keychains to get a feel for how broad this category really is. None of these items require hand-sewing after the machine finishes, which is a huge part of the appeal.
Why Sellers Love ITH Projects
ITH designs are especially popular with Etsy sellers and boutique craft vendors because they produce polished, sellable finished goods with minimal extra equipment. Your embroidery machine does the heavy lifting, and the result looks professional without requiring advanced sewing skills or extra tools.
Hoop Size Matters More Here
Because the entire item is built inside the hoop field, your hoop dimensions directly determine the maximum finished size of whatever you are making. A 5x7 hoop produces a noticeably smaller zippered pouch than a 6x10 hoop. Knowing your hoop size before browsing ITH designs is a non-negotiable first step, not an afterthought.
Browsing an ITH-specific category in a downloadable design catalog is one of the best ways to expand your machine's output beyond decorated apparel and into handmade gifts, seasonal accessories, and personalized items people actually want to buy or receive.
How to Choose the Right Embroidery Hoop for Your Next Project
Everything you have learned about hoop materials, types, sizes, and machine compatibility comes together the moment you sit down with a specific project in mind. Here are five practical steps to make sure you pick the right embroidery hoop every single time.
1. Start with your design dimensions, not a guess.
Before you reach for any hoop, figure out how large your finished design will be. Measure it out on paper or note the dimensions listed in the design file details. Once you have that number, add at least half an inch of clearance on every side between the design edge and the inner hoop boundary. That buffer is not optional padding; it is what keeps your fabric taut, your registration accurate, and your stitches clean. Undersized hoops are one of the most common causes of fabric distortion and misaligned stitching, especially for beginners who are still building their feel for how fabric behaves under tension. For a deeper look at how dimensions map to specific projects, Embroidery Hoop Dimensions: Choosing the Right Size for Your Project is a solid reference.
2. Match the hoop type to how you actually work.
A traditional screw-tightened hoop is perfectly fine for a single decorative piece where you have time to adjust and settle the fabric carefully. But if you are batch-stitching team apparel, working with thick fleece, or layering materials, a magnetic or adjustable-tension hoop will save you real time and frustration. The Complete Guide to Choosing the Perfect Embroidery Hoop walks through how magnetic systems handle difficult materials that traditional hoops struggle to grip consistently.
3. Confirm machine compatibility before you buy anything.
Pull out your machine manual and check which hoop sizes and bracket types are listed as compatible. Then cross-reference that list with the hoop product description before purchasing. Your machine may even display compatible hoop options when you load a design, which takes a lot of the guesswork out of the process.
4. Let the design file tell you the minimum hoop size.
Every downloadable embroidery design file includes a listed hoop size in its product details. That number is the minimum sewing field required to run the design without splitting it across multiple hoopings. If your hoop is smaller than that listed size, the file simply will not stitch correctly. This is a detail that trips up a lot of beginners who assume the listed size refers to the finished design rather than the required hoop field.
5. Build your starter collection around a 4x4 and a 5x7.
If you are just starting out, these two sizes cover the vast majority of designs in most downloadable embroidery catalogs, including sports logos, monograms, children's motifs, and seasonal designs. Start with both sizes in a format compatible with your specific machine, and you will have enough range to take on almost any beginner or intermediate project right away.
Popular Design Themes by Hoop Size: What to Stitch in Each Field
Matching the right design to the right hoop size is one of those practical skills that makes every project feel more intentional. Once you know which themes naturally fit each embroidery field, shopping for designs becomes a lot more satisfying and your finished pieces look exactly as polished as you imagined.
The 4x4 hoop is your go-to for compact, high-impact placements. This size shines with single-character anime icons, individual sports team logos sized for hat fronts, country flag patches, monogram initials, and small holiday ornaments. The limited stitching area rewards clean, simple artwork with strong outlines and minimal background filler. Think of it as your precision tool, perfect for cuffs, pockets, beanies, and anywhere a small burst of personality fits better than a full graphic panel.
The 5x7 hoop opens the door to more complex storytelling in a single design. Full character illustrations, children's themed panels with background scenes, nature motifs that include foliage and depth, machine embroidery fonts rendered at a readable point size, and mid-size sports graphics that combine a team name with a logo all live comfortably in this field. It is the most versatile everyday size for home embroiderers who want variety without committing to large-format projects every time. According to A Crafter's Guide to Embroidery Hoops Sizes for Perfect Projects, matching your hoop to your design's actual stitch field, not just the outer dimensions, is key to avoiding registration problems.
The 6x10 and 8x12 hoops are where statement-level work happens. Full university logos, NFL and college team graphics featuring stadium artwork or mascot illustrations, oversized floral panels for pillows and wall art, and seasonal designs built for sweatshirt chests or large tote bags all need this kind of real estate to land with impact.
Here is the part that makes building a design library especially practical: themed collections across sports, anime, cartoons, and university athletics are typically offered in multiple hoop size variations within a single listing. You buy the collection once and stitch it across completely different project types and garment placements without hunting for a separately formatted version.
That structure is a genuine advantage when you are putting together a matched set of team spirit items for a family. Choosing designs from the same themed collection keeps the artwork style and visual weight consistent whether one item uses a 4x4 hat logo and another uses a 5x7 shirt panel.
Why Embroidery Hoops Are Having a Moment Right Now
If you have been noticing more embroidery content popping up in your social feeds and more machines showing up in craft rooms, you are not imagining it. The numbers back up what crafters are already feeling on the ground. The global embroidery hoop set market is projected to grow from USD 290.5 million in 2025 to USD 571.5 million by 2035 at a compound annual growth rate of 7.0%, and that kind of sustained momentum does not happen by accident. The drivers behind it are a combination of cultural shifts and practical technology upgrades that have genuinely changed who can get into embroidery and how fast they can produce results worth showing off.
Personalization is the biggest engine pulling this growth forward right now. People in 2026 want their gear, gifts, and home items to reflect something specific about them, whether that is a college team, a favorite anime character, a sports franchise, or a personal aesthetic. Machine embroidery with downloadable design files is one of the most direct ways to deliver that kind of specificity at home, without commissioning custom work or paying boutique prices. That demand pattern lines up almost perfectly with how digital design libraries are structured, making it a genuinely exciting time to own a machine.
On the hardware side, features that used to justify premium price tags have quietly become standard. Large hoop formats and wireless design transfer are now baseline expectations on modern home embroidery machines rather than upgrades you have to shop for specifically. Magnetic hoops are also gaining serious traction in the home embroidery community; crafters consistently describe the snap-in design as faster, gentler on fabric, and more consistent for alignment compared to traditional screw-tightened options.
Perhaps the most beginner-friendly shift of all is how the entire workflow has moved online. According to embroidery hoop set market research, e-commerce is one of the headline growth drivers in this category, and that tracks with how most hobbyists actually shop today. You can order your hoop, download your design file, and have a finished project in progress all in the same afternoon, without leaving home. Accessibility has genuinely never been less of a barrier for someone just starting out.
Choosing Your Hoop Is the First Step — Your Design Is the Next One
You have made it through the full decision chain, and here is the quick version worth keeping in mind: material and mechanism set your foundation, hoop size must match both your machine and your project, file format locks your downloads to your specific machine brand, and design selection only makes sense once all three of those boxes are checked. Every step feeds the next one, and skipping any of them is where beginners run into preventable frustration.
The most important takeaway from that chain is that hoop size is not just a hardware detail. It is a direct filter for every design you will ever purchase. Your hoop's stitchable field, whether that is a 4x4, 5x7, or 8x12 area, is the hard boundary for any design file. Once you know that number, use it. When you browse a design catalog, your hoop field immediately eliminates incompatible files and points you straight to designs that will actually stitch out correctly. That is a practical shopping superpower that saves time and money.
With that knowledge in hand, embroiderynsewing.com is a natural next destination. The catalog covers sports teams, anime, children's themes, seasonal designs, decorative fonts, and dozens of other categories, all available as instant-download files in multiple formats so your machine is covered regardless of brand.
Embroidery is genuinely accessible at every skill level, and a massive library of ready-to-stitch designs is waiting for you right now.
Conclusion
Choosing the right embroidery hoop does not have to be overwhelming. Remember these key takeaways: material matters, so match your hoop to your fabric and project type; size should frame your design with a little breathing room on all sides; and certain designs genuinely perform better with specific hoop styles.
Most importantly, the "perfect" hoop is the one that keeps your fabric taut, fits comfortably in your hands, and suits the project in front of you.
Now it is time to put this knowledge to work! Head to your local craft store, pick up a beginner-friendly wooden or bamboo hoop in a medium size, and start stitching. Every experienced embroiderer started exactly where you are right now. With the right tools in hand, your first beautiful piece is closer than you think.