
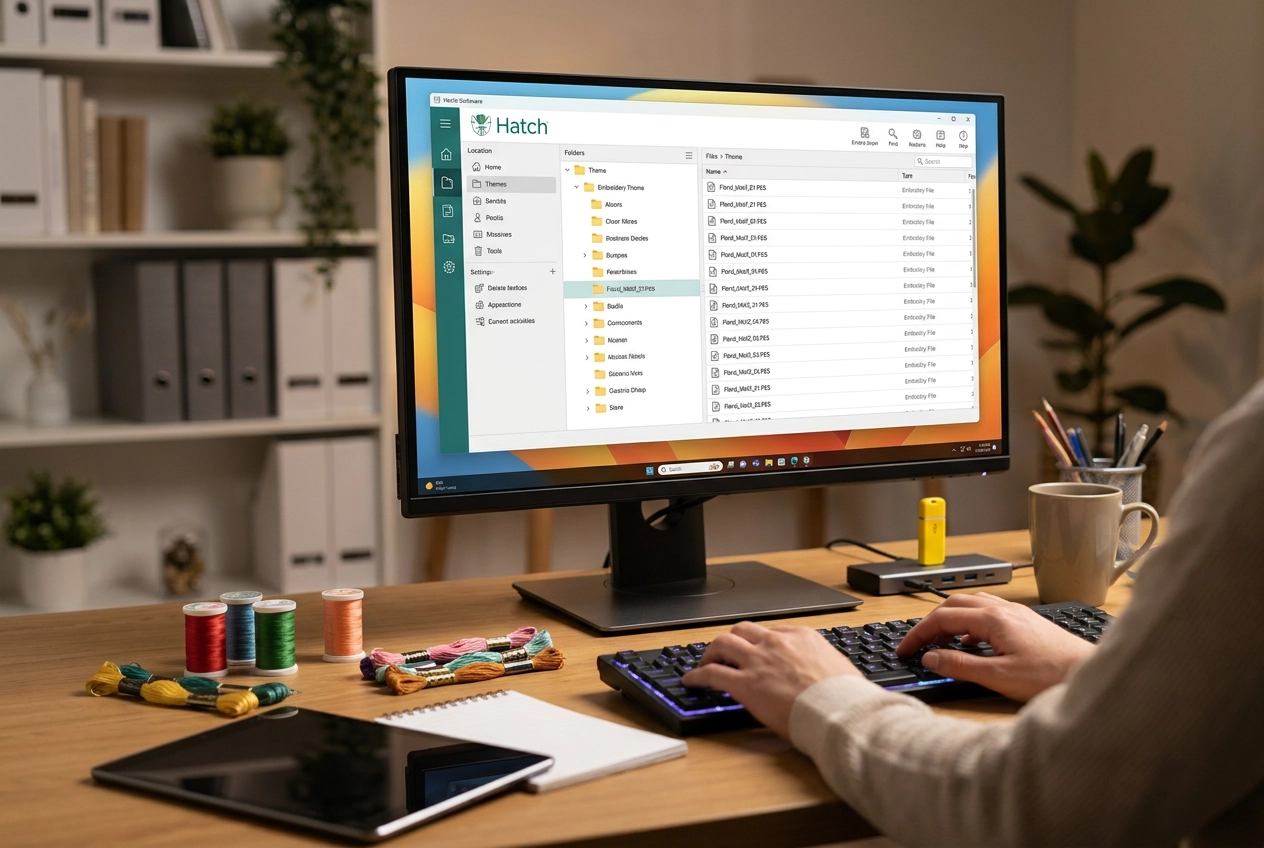
Picture this: you've just finished creating what feels like your hundredth floral design in Hatch Embroidery, and now you can't find it anywhere. Sound familiar? If you're nodding your head right now, you're definitely not alone.
Building a well-organized design library is one of those things nobody really talks about when you're first getting started with hatch embroidery software, but it can make a massive difference in how smoothly your projects come together. A messy, disorganized library slows you down and adds unnecessary frustration to what should be a fun and creative process.
The good news is that getting your design library in order is easier than you might think, and you don't need to be a tech wizard to make it happen. In this tutorial, we're going to walk through everything step by step. You'll learn how to organize your existing designs, create a folder system that actually makes sense, use built-in Hatch tools to manage your files, and set yourself up so that finding any design takes seconds instead of minutes. Let's get started!
What Is Hatch Embroidery?
If you've been spending any time in the machine embroidery world, you've probably heard the name Hatch come up more than once. So what exactly is it? Hatch Embroidery is a software product family developed by Wilcom International, one of the most respected names in embroidery technology. The current version, Hatch Embroidery 4, is designed specifically for home stitchers, serious hobbyists, and small-business decorators who want powerful digitizing tools without the complexity or cost of full commercial software. Think of it as the sweet spot in the market, capable enough to handle real projects, approachable enough that beginners can actually learn it.
Where Hatch Sits in the Software Landscape
One of the easiest ways to understand Hatch is to think about the range of embroidery software available. On one end, you have basic programs bundled with embroidery machines, which are great for getting started but limited in what you can actually create. On the other end, you have professional commercial platforms built for high-volume digitizing studios, often priced well above $1,000 for upgrades alone. Hatch lives confidently in the middle ground. It gives home stitchers and boutique apparel makers access to serious digitizing capability at a price point that makes sense for a hobby or small operation. The Hatch Embroidery Digitizer 4 flagship tier, for example, is available as a Mega Pack for $1,899, which bundles software, font packs, and design collections with a claimed value of over $4,800.
Four Tiers, One Family
The Hatch product family includes four progressively capable tiers: Organizer, Personalizer, Composer, and Digitizer. Organizer focuses on managing and making basic edits to existing designs. Personalizer adds customization tools. Composer opens up broader design creation features. Digitizer is the full package, giving you complete control over creating original stitch files from scratch. This tiered structure means you can start at a level that fits your current skill set and budget, then grow from there.
A Free Trial That Changes the Conversation
One detail worth knowing is that Hatch offers a 30-day free trial, which you can find prominently featured across the Hatch Embroidery website. That kind of no-commitment entry point means a large portion of active users are exploring the software right now while also looking for ready-to-stitch design files to practice with and use immediately. The global embroidery industry is valued at over $4 billion as of 2026, with hobbyists and small businesses making up a growing share of that market. Hatch is the primary software beneficiary of that mid-market growth, which is exactly why understanding it matters whether you plan to digitize your own designs or simply want to work with files you download and stitch right away.
Hatch Tier Breakdown for Design Buyers
Now that you know what Hatch is, let's talk about which version actually makes sense for you. The four tiers look similar on paper, but they serve pretty different needs depending on how you plan to use your downloaded design files. Here's a plain-English breakdown of each one.
Organizer: Keep Your Files in Order
Hatch Organizer is the entry-level tier, and it does exactly what the name suggests. It helps you manage, view, and organize your downloaded embroidery design files without overwhelming you with features you don't need yet. The real workhorse capability here is format conversion, which lets you take a design file you've purchased and convert it to the specific format your machine requires. You can also resize existing designs and swap out thread colors on files you've already bought. What you won't get at this tier is any kind of text editing, object manipulation, or digitizing. Think of Organizer as your embroidery filing cabinet with a few handy conversion tools built in. For someone who's just starting to build a design library from a marketplace, it's a practical, low-commitment starting point.
Personalizer: Add Your Own Text
Hatch Personalizer steps things up by adding basic lettering and monogramming to everything Organizer already does. This tier includes over 80 professional monogram templates and 63 professionally digitized fonts, plus support for TrueType fonts. That means you can take a downloaded design from your library and add a name, set of initials, or short phrase directly on top of it. For anyone making personalized gifts, custom baby items, or team apparel, this is the tier where the real fun starts. Resizing is still available here, though it's important to stay within safe stitch-density limits when you scale a design up or down. Going too large or too small without proper digitizing adjustments can cause quality issues at the machine, so Personalizer is best used for modest sizing changes rather than dramatic rescaling.
Composer: Edit Like a Pro (Without Digitizing)
Hatch Composer is where things get genuinely powerful for people who love working with pre-made designs. Priced at US$599 with a FlexPay option available, this mid-tier product includes everything from the two lower tiers plus the ability to edit designs at the object level. That means you can change color sequences, reshape design elements, swap stitch types, and combine pieces from different files into one cohesive project. Composer also includes auto-digitizing, which converts an image into an embroidery design automatically. For a buyer who regularly purchases designs from a marketplace and wants to adapt them for different fabric types, garment sizes, or customer requests, Composer is a strong match. It gives you real creative flexibility without requiring you to learn manual digitizing from scratch. You can check out Hatch's own tier comparison page to see a full side-by-side breakdown.
Digitizer: The Full Package
Hatch Digitizer is the top tier and includes every feature across the entire product line. This is the version for users who want to create original designs from a blank canvas or edit purchased files at the stitch level. The Digitizer Mega Pack, aimed at new customers, is priced at US$1,899 with a claimed bundle value of over US$4,800, including fonts, design collections, and additional tools. It also includes full manual digitizing, appliqué and redwork digitizing, 108 professionally digitized fonts, and advanced tools like Color PhotoStitch. A FlexPay option at approximately US$99 per month over 12 months makes it more accessible if the upfront cost feels like a stretch. If you're serious about growing your embroidery business or simply want maximum creative control over every file you ever stitch, Digitizer is the version to aim for.
No matter which tier you choose, one practical detail will affect your daily workflow more than any other feature: whether your version of Hatch can actually import the file formats included in the designs you buy. That's the next thing we'll cover.
Hatch File Format Compatibility: What You Need to Know Before You Buy
One of the most practical things you can do before downloading any embroidery design is understand exactly which file formats your software can handle. The good news for Hatch users is that the software reads and writes an impressively wide range of formats. We're talking about all the major ones: .DST (Tajima), .PES (Brother and Baby Lock), .JEF (Janome), .EXP (Melco/Bernina), .XXX (Singer), .HUS and .VP3 (Husqvarna Viking and Pfaff), and Hatch's own native .EMB format. In fact, the official Hatch support documentation covers over 30 individual file extensions on the read side alone, which means Hatch is essentially a universal translator for machine embroidery files. If you're ever unsure whether Hatch works with your specific machine brand, the answer is almost certainly yes.
Your Single Most Important Pre-Purchase Step
When you're browsing designs on a marketplace like Embroidery N Sewing, always check the file format list before you buy. Most quality design shops package their downloads as multi-format ZIP files, meaning one purchase delivers the same design in .PES, .DST, .JEF, .VP3, and several other formats all at once. That's a huge win because it means a Brother owner and a Janome owner can buy the same listing and each get exactly what they need. For Hatch users specifically, this multi-format packaging eliminates the guesswork entirely. You download the ZIP, open the format that matches your physical machine, and you're ready to stitch. The practical checklist is simple: confirm the listing mentions your format before checking out, and you'll never run into a mismatch problem.
Why .EMB Should Be Your Working File
Here's something that trips up a lot of beginners. If you plan to open a purchased design inside Hatch and make any edits before stitching, save it as an .EMB file first. Hatch's native .EMB format retains full object properties, color sequences, and stitch type data in a way that machine-specific formats simply cannot. Formats like .DST, for example, don't carry color information at all. The Hatch support team puts it plainly: save to .EMB before you export to your machine format, because going back to edit a stitch file later means losing information you can't recover. Think of .EMB as your editable working copy and your machine format (.PES, .JEF, etc.) as the final export you send to the embroidery machine.
A Note for Hatch Organizer Users
If you're running Hatch Organizer, the entry-level tier, your main use case is probably file management and format conversion rather than hands-on digitizing. That makes multi-format download packages even more valuable for you. When you buy a design package that already includes your needed format, you skip the conversion step entirely and go straight to organizing and stitching. Reviewing what each Hatch tier includes can help you decide whether your current level covers everything you need, especially as your project library grows.
When to Digitize in Hatch vs. Buy a Ready-Made Design
Hatch Embroidery gives you a genuinely powerful digitizing engine, and knowing when to use it versus when to simply buy a ready-made file is one of the most practical decisions you'll make as an embroiderer. The short answer is this: Hatch is an incredible tool for the right job, but not every job needs to be built from scratch.
Complex artwork takes serious time to digitize well. Sports team logos, anime characters, detailed cartoon illustrations, and multi-color collegiate crests are among the most demanding files you can attempt to digitize manually. An intermediate user working carefully through stitch paths, underlay layers, color sequencing, and density settings on a design like that can easily spend anywhere from three to eight or more hours on a single file, and that estimate assumes the artwork is already cleaned up and ready to trace. For a beginner still learning the Hatch workflow, that timeline stretches even further. Time is a real resource, and spending a full workday on one design is a significant commitment.
The buy-vs.-build math usually favors buying. Instant-download embroidery designs from digital marketplaces typically run somewhere in the $3 to $9 range per file and arrive already formatted for your machine. That kind of price point represents a straightforward trade-off: a few dollars versus several hours of your own time. For designs with broad appeal, especially anything in the sports, fandom, or licensed character space, professionally digitized ready-made files are almost always better looking right out of the box than what most intermediate users can produce in a single session. At Embroidery n Sewing, for example, the catalog covers exactly these high-demand categories, including NFL themes, anime motifs, collegiate-style designs, and cartoon characters, so you can download, load, and stitch the same day without ever opening the digitizing workspace.
Auto-digitizing has a real ceiling. Hatch does include auto-digitizing tools, and they are genuinely useful for the right kind of artwork. Simple silhouettes, two-color logos, high-contrast clip art, and bold text-based designs often run through auto-digitizing with decent results. But push that tool toward fine detail, color blending, intricate outlines, or layered illustration work and the output typically breaks down. Stitch density gets inconsistent, outlines lose their crispness, and color separations look muddy on the final sew-out. Sports logos and character art almost always fall into this "too complex" category for auto-digitizing to handle cleanly.
A useful rule of thumb: if a design would take you more than two hours to digitize manually, or if a test run through auto-digitizing produces stitch density issues or rough outline quality, a professionally digitized ready-made file is almost certainly the more efficient and better-looking path forward. This isn't a knock on your skills; it's just an honest assessment of where the time investment stops making sense.
Where DIY digitizing in Hatch absolutely earns its place is on projects that genuinely cannot be purchased anywhere. Original artwork you created yourself, a personalized name badge with a unique typographic layout, a proprietary business logo that belongs to your brand, or a custom design for a one-time event are all cases where building the file yourself is not just reasonable but necessary. Real users in the Hatch community confirm this pattern: even people with strong graphic design backgrounds tend to use pre-made files for recognizable themes and reserve manual digitizing for work that genuinely has no off-the-shelf equivalent.
The bottom line is that Hatch gives you the capability to do both, and the smartest embroiderers use both strategies depending on the project in front of them.
Best Design Categories for Hatch Users to Download and Stitch
Once you understand when to buy versus build (covered in the previous section), the next practical question becomes: which design categories are actually worth sourcing as ready-made downloads? The answer comes down to where auto-digitizing struggles most and where professional files deliver the biggest quality jump. Here are the five categories where downloading beats DIY every single time.
Sports and Collegiate Designs
Sports and collegiate artwork sits at the top of the list for good reason. NFL team themes, college athletics logos, and stadium-inspired designs all share the same structural challenges: multiple tight color registrations, fine lettering that needs to hold up at small sizes, and layered shapes like shields, mascots, and wordmarks that require precise stitch sequencing. Even with the improved stitch path planning introduced in Hatch Embroidery 4, auto-digitizing these multi-element designs produces inconsistent results that require significant manual correction. For makers who want to stitch team gear, fan gifts, or spirit wear quickly, sourcing pre-made files from a catalog like embroiderynsewing.com is simply the most practical path forward.
Anime and Cartoon Character Designs
Character designs from anime and cartoons look fantastic on finished garments, but they are genuinely difficult to digitize well. Fine outlines, precise color separation between adjacent areas, and multi-layer stitch sequencing all demand deliberate, human-guided digitizing decisions. Even beginner Hatch Digitizer tutorials make it clear that experienced users find complex pictorial artwork technically demanding, and auto-digitizing tools frequently misassign stitch types across character detail areas. The result with auto-digitized character files is often muddy outlines, color bleed between zones, and stitches that compete rather than layer cleanly. Professional pre-made files have already solved these problems before you even open the design.
Children's Motifs and Seasonal Designs
If you produce items for boutique apparel shops, gift markets, or holiday craft fairs, this category is where speed matters most. Children's motifs and seasonal designs (think back-to-school, Halloween, Christmas, Easter, and Valentine's Day themes) are high-volume by nature. Boutique decorators often need to run dozens of variations across a short seasonal window, and spending time digitizing each one simply is not sustainable. Instant-download files eliminate the digitizing bottleneck entirely. You purchase, download, load into Hatch, and start stitching. For makers juggling multiple client orders or restocking a busy Etsy shop, that kind of rapid project turnaround is a genuine competitive advantage.
Country Flag and Transportation-Themed Designs
Here is a category that surprises a lot of beginners. Flag designs and transportation-themed artwork look simple at first glance: clean color blocks, straight borders, geometric shapes. The reality is that large flat-fill areas are some of the trickiest elements to digitize correctly. Without careful stitch direction planning, flags and vehicle outlines develop fabric pull, color bleed at color boundaries, and visible registration gaps. Hatch's own educational content emphasizes that stitch direction and type selection are non-trivial decisions even for skilled digitizers. Auto-digitizing defaults tend to apply generic fill patterns that cause distortion across exactly the kind of broad, flat shapes these designs rely on. Professionally digitized files have already worked through those stitch direction decisions, which means your finished piece lies flat and looks clean.
Nature Motifs and Floral Designs
Floral and nature designs are among the most popular categories for garment decoration, home décor projects, and craft market sellers. They are also where auto-digitizing quality reaches its ceiling fastest. Organic petal shapes, leaf curves, and gradient-style shading require stitch density adjustments and direction changes that auto tools handle inconsistently. The result is often a design that looks acceptable on screen but stitches out with visible gaps, uneven texture, or shading that reads as patchy rather than smooth. Curated pre-made files from a well-stocked catalog give you polished, tested results across all of these shapes without the trial-and-error. For anyone selling finished items where stitch quality is visible to the buyer, that reliability is well worth the small download cost.
Hatch Fonts and Monogramming: When Add-On Packs Are Not Enough
Hatch actually has one of the more developed font ecosystems in hobbyist embroidery software. With at least 17 numbered font add-on packs available for separate purchase, you can extend the base software with styles ranging from Script and Monograms all the way through 3D Puffy Foam, Block, Modern Script, Tall and Thin, and Fancy Fonts. That is a genuinely solid foundation for everyday personalization work, monogrammed towels, name drops on kids' clothing, and custom gift projects.
That said, the packs have limits that become obvious once you start pushing into more specialized territory. If you are stitching collegiate-style lettering for sports fan apparel, athletic script for a team jacket, or novelty display lettering for a boutique baby brand, you will quickly notice that the built-in library was not built with those applications in mind. The style range skews toward general-purpose decorative and script categories, which works beautifully for mainstream personalization but leaves gaps for makers who want to match the look and feel of specific aesthetics tied to sports, fandoms, or regional culture.
This is where downloading embroidery font files from a dedicated design catalog makes a real difference. A well-stocked marketplace carries font collections built specifically for the themes that Hatch's packs do not target, and because those files are purpose-built for the embroidery machine rather than adapted from computer typefaces, they already come size-optimized and density-tested for the hoop ranges they are meant for. That matters more than it sounds. When you scale a software-native font outside its intended range, you can end up with pull compensation issues, thin coverage, or stitches that simply do not look right on fabric. A pre-digitized font file removes that variable entirely because the stitch engineering is already done.
For anyone focused on lettering and personalization as a core part of their embroidery work, supplementing Hatch's font packs with downloadable design files is a low-cost way to dramatically expand your creative range without touching your software subscription or moving up a tier. You get more style options, better niche coverage, and files that are already ready to hoop.
Getting the Most from Hatch Plus a Ready-Made Design Library
Once you've got a collection of downloaded designs and Hatch open on your screen, the real fun begins. Knowing how to work with your software rather than around it is what separates a frustrating stitching session from a smooth one. Here are the five workflow habits that make the biggest difference.
Remapping thread colors is your first move. When you open a downloaded design file in Hatch, the assigned thread colors might not match what's actually sitting in your thread cabinet. That's completely fine, because Hatch's color editing tools let you reassign individual color stops to match your available inventory or a customer's specific brand palette. You can select a color object, swap it out for a thread from your preferred brand's color library, and preview the result before you ever touch your machine. This single feature makes pre-made files far more flexible than they look at first glance, and it's one of the reasons the Hatch Embroidery User Group is full of people happily using marketplace downloads in their everyday workflow.
Resize with intention, not just instinct. It's tempting to scale a design up or down to fit a different project, but resizing downloaded files carries real risk. Most professionally digitized designs include a recommended size range, and stretching or shrinking beyond roughly 20 percent in either direction can throw off stitch density and cause registration problems where fill areas no longer line up cleanly with outlines. Always check the file's documentation for its suggested dimensions before you resize, and stay within that window whenever possible.
Combine files to build something original. Hatch's design combining capability, available at the Composer and Digitizer levels, lets you layer or merge elements from separate downloaded files into one cohesive composition. A practical example: pull a sports team logo file from your design library, add a name or number using one of Hatch's font packs, and position both elements together on a jacket back. Choosing your level on the Hatch site breaks down exactly which tier unlocks these combining tools, so it's worth a quick review if you're not sure what your current version supports.
Export in the right format before you transfer anything. After editing, you need to save the final file in the format your specific machine reads. Hatch's multi-format export handles this smoothly, supporting output for Brother (.PES), Janome (.JEF), Husqvarna/Viking (.VIP), and other major machine brands. Skipping this step or exporting in the wrong format is one of the most common beginner mistakes, and it's entirely avoidable.
Keep your design library organized from the start. Hatch Organizer, the entry-level tier in the Hatch family, gives you cataloguing and thumbnail-preview tools for your local design collection. Higher tiers build on these features. If you're managing orders across multiple themes and customer specs, an organized library means you can locate a file in seconds rather than hunting through folders.
Stitch Smarter: Hatch Plus the Right Design Library
Hatch Embroidery is genuinely one of the best mid-market digitizing tools available in 2026, but even great software has limits. Manually digitizing a detailed sports logo, a cartoon character, or a collegiate crest takes hours, and the results still depend heavily on your skill level. That is where a ready-made design library stops being a shortcut and starts being a smart strategy.
The most efficient Hatch users treat their software and a pre-made catalog as partners, not substitutes. Hatch handles the personalization, the editing, the original lettering projects, and the custom work. A well-stocked instant-download catalog handles the complex artwork, the popular fandom themes, and the high-volume categories where starting from scratch simply does not make sense.
That is exactly what embroiderynsewing.com is built for. The catalog covers sports, collegiate, anime, cartoon, children's, seasonal, nature, and font designs, all ready to download and load straight into your Hatch-compatible machine. No digitizing queue, no guesswork, no lost afternoon.
The takeaway is simple. Next time a project calls for a sports logo or a cartoon character that would take hours to build manually, browse the catalog first and start stitching today.
Conclusion
Getting your Hatch Embroidery design library under control is genuinely a game-changer for your workflow. To recap the key points: a logical folder system saves you hours of searching, consistent file naming conventions make every design instantly findable, Hatch's built-in tools do the heavy lifting when you use them intentionally, and a little ongoing maintenance keeps things from spiraling back into chaos.
The best part? You don't have to tackle everything at once. Start with just one folder or one category today, and build from there.
Your creativity deserves a workspace that supports it, not one that fights against it. When your library is organized, you spend less time hunting and more time actually designing. So open up Hatch right now, create your first organized folder, and take that first step toward a smoother, more enjoyable embroidery experience.