
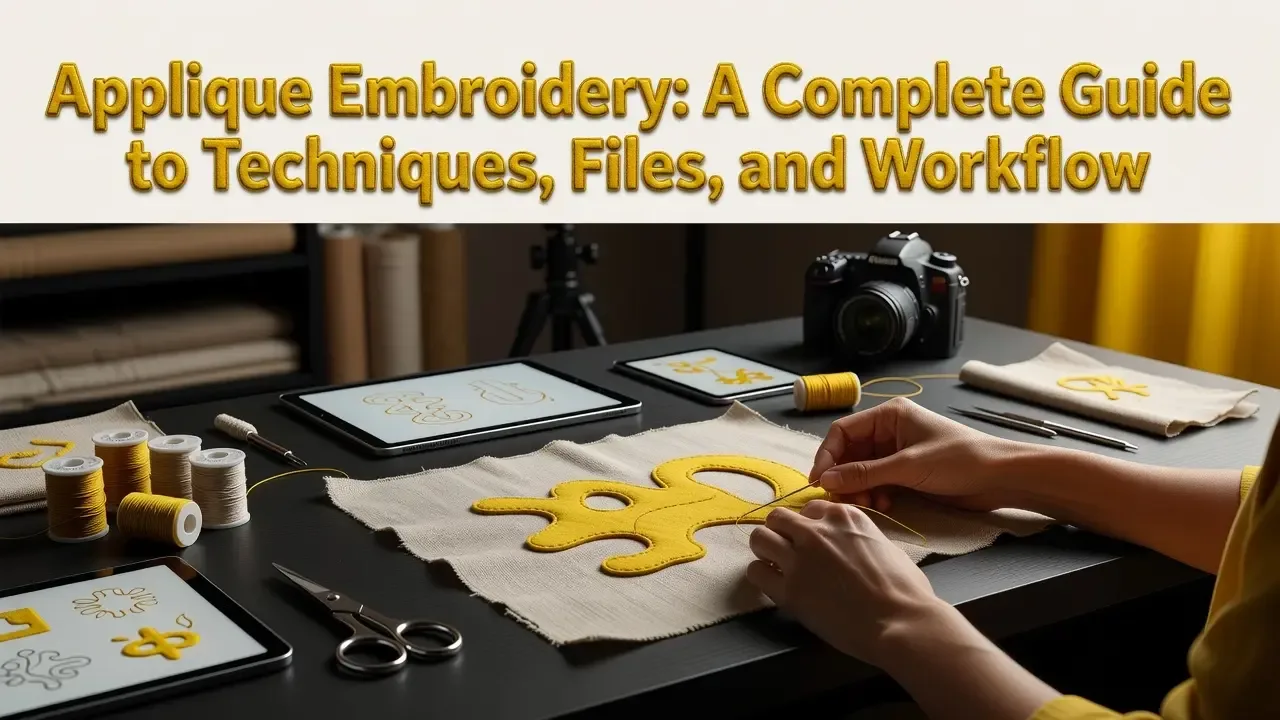
Have you ever looked at a beautifully decorated quilt or a custom jacket and wondered how those stunning fabric designs were stitched on so perfectly? Chances are, you were admiring applique embroidery, and the good news is that it is much more approachable than it looks.
Applique embroidery is a technique where fabric pieces are layered onto a base material and secured with decorative stitching. The result is a dimensional, eye-catching design that adds texture and personality to almost anything. Whether you are customizing clothing, personalizing home decor, or just exploring a new creative hobby, this technique opens up a whole new world of possibilities.
In this guide, we are going to walk through everything a beginner needs to know. You will learn how the process works, what files you need for your embroidery machine, and how to set up a smooth workflow from start to finish. No experience required, just curiosity and a willingness to try something new. By the end, you will feel confident enough to tackle your very first applique project. Let's get started!
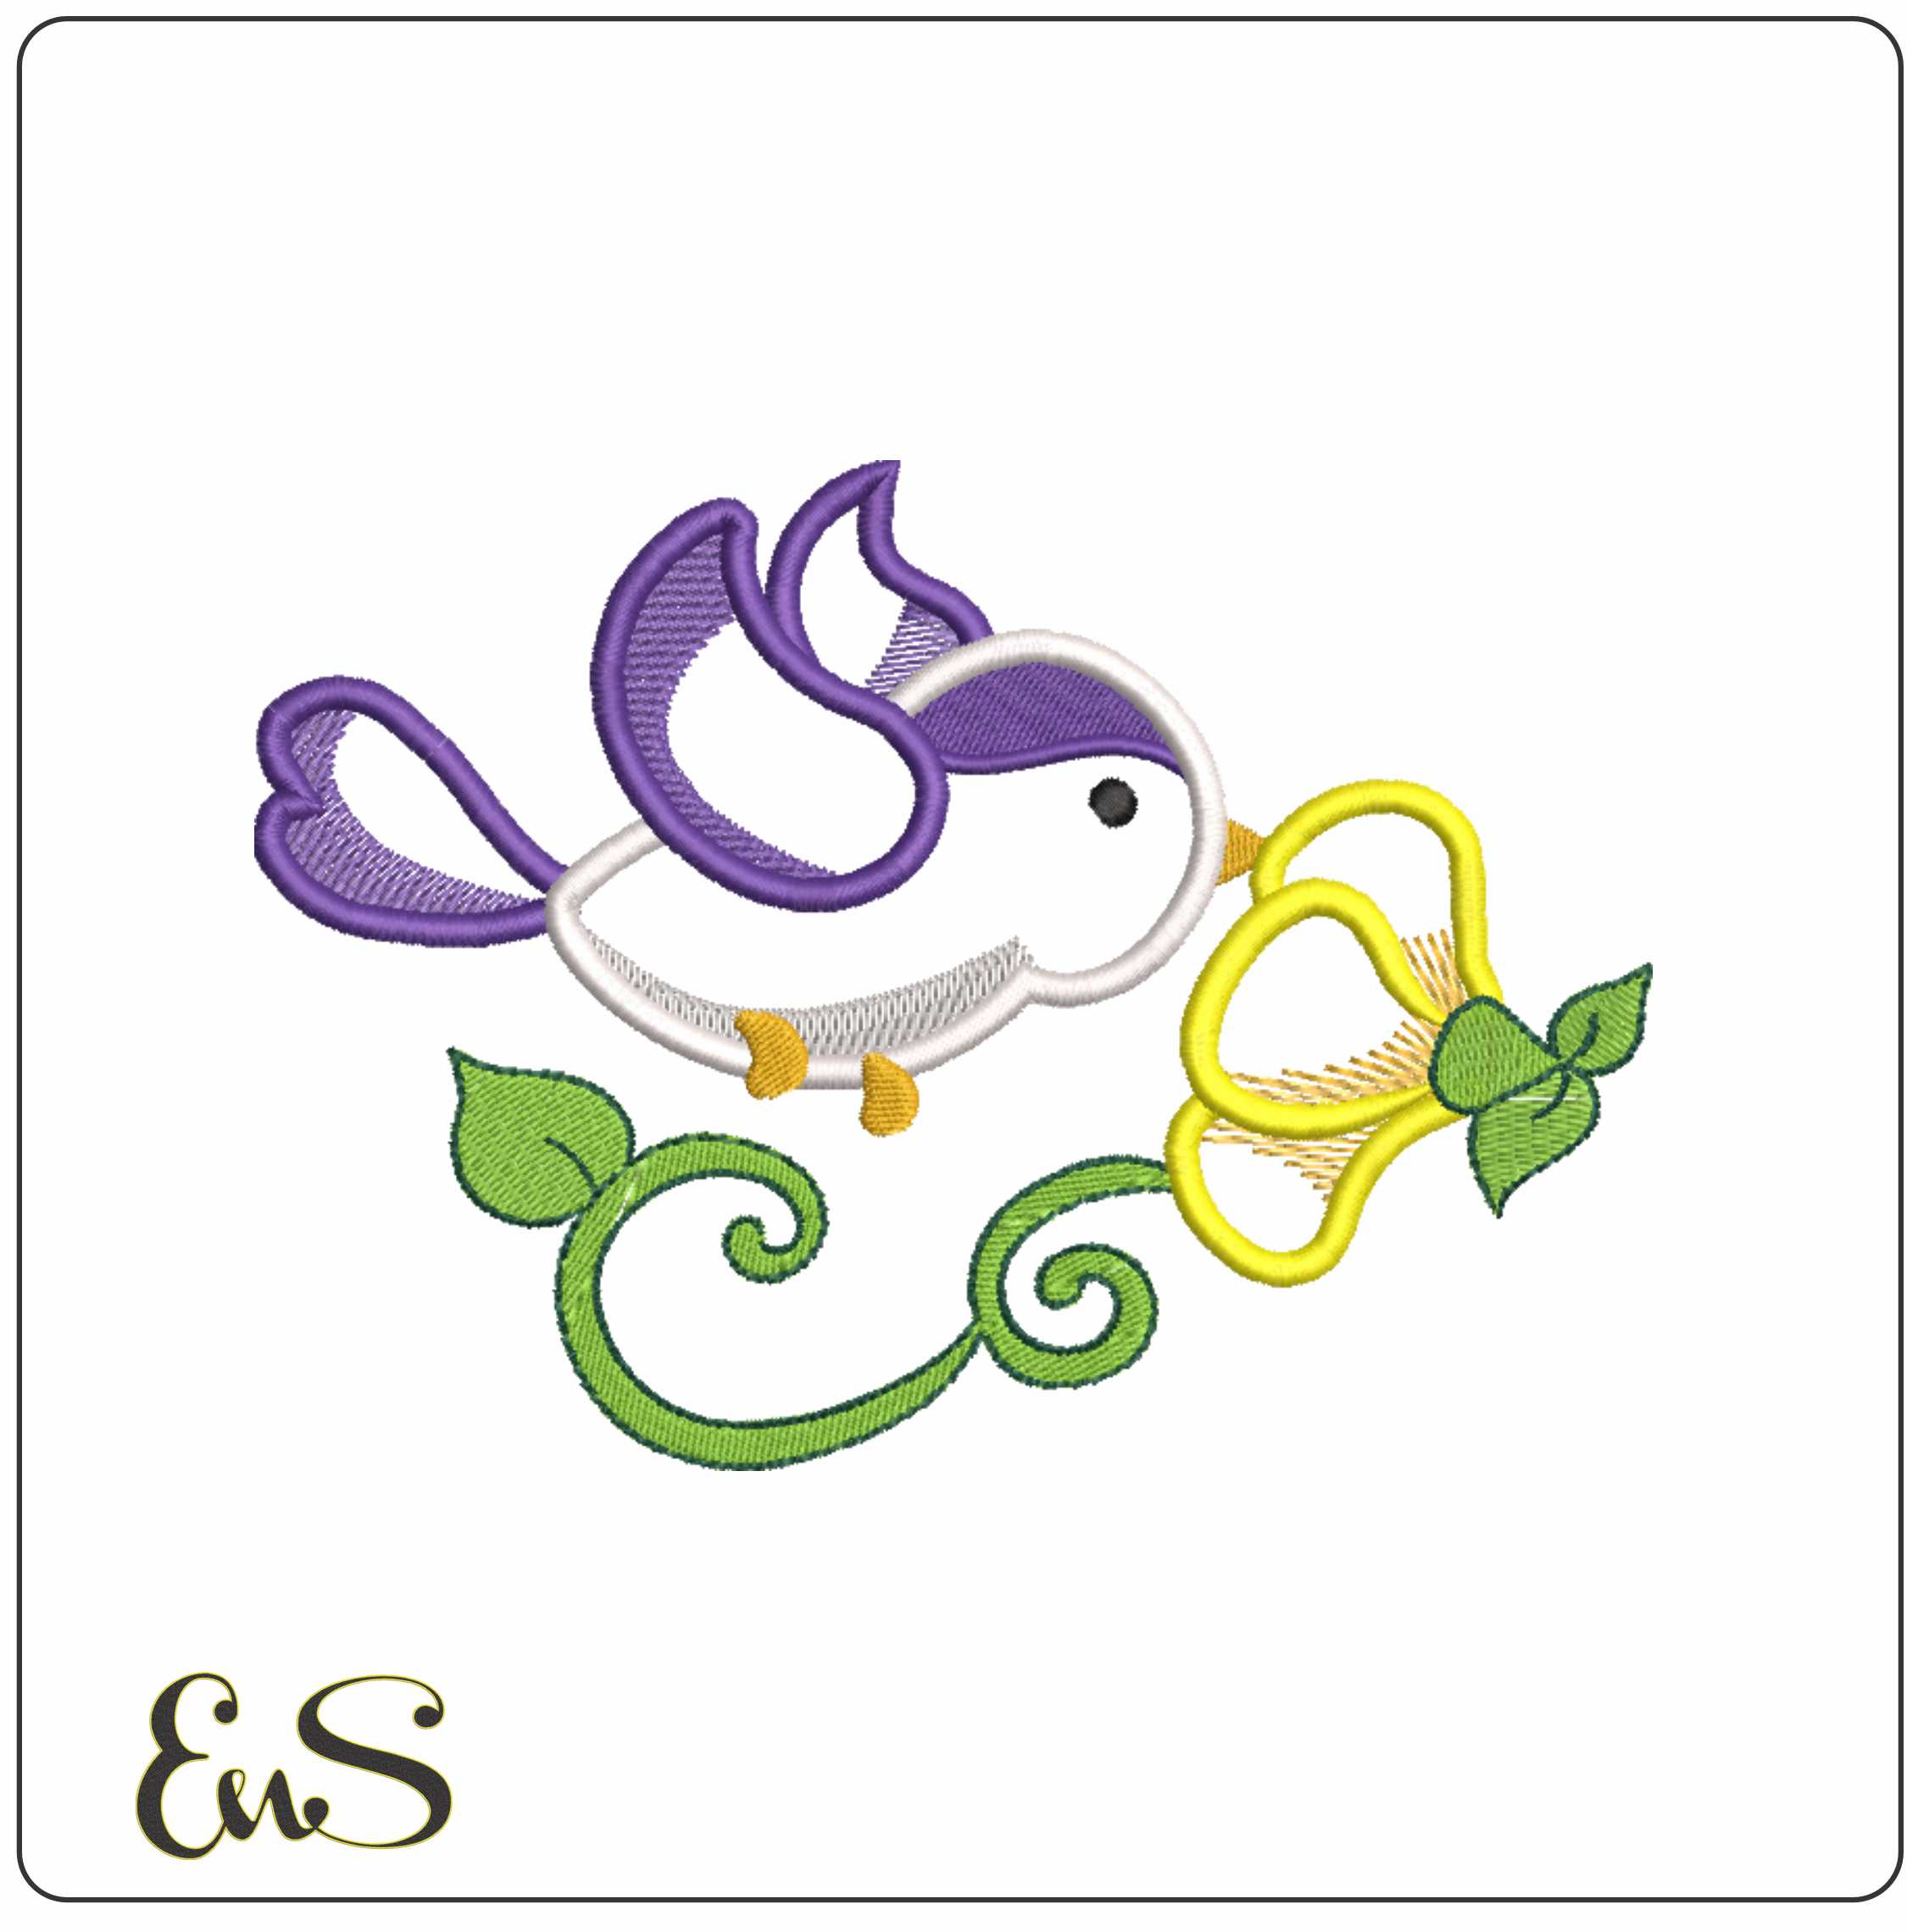 Embroidery designApplique Bird With FlowerView this design →
Applique embroidery is a technique where you attach a cut piece of fabric onto a base material and then secure and decorate it with machine-stitched thread. The word itself comes from the French "appliquer," meaning simply "to apply," which is a pretty good description of what you're doing: applying one fabric on top of another. The big difference between applique and standard fill-stitch embroidery is where the visual coverage comes from. In a regular fill-stitch design, the machine builds up solid color areas entirely from thread, stitch by stitch. With applique, the fabric itself handles that coverage, and the thread works around it to secure edges and add detail. Think of it like the difference between painting a wall with a brush stroke by stroke versus hanging wallpaper and then painting the trim.
How the Stitching Sequence Works
A well-digitized applique file runs through three distinct stages, and understanding this sequence makes the whole process click for beginners. First comes the placement stitch, sometimes called the tack-down stitch, which outlines exactly where your applique fabric needs to go on the base material. You use that stitched outline as your guide, lay the fabric down, and then let the machine continue. The second stage is a satin or zigzag border stitch that wraps over the raw fabric edge, locking it permanently in place and giving it a clean, finished look at the same time. Finally, the machine adds decorative detail stitches on top, which might include shading, facial features on a character design, or any fine linework that brings the piece to life. This three-stage approach is what separates a properly digitized applique file from simply hooping fabric and hoping for the best. You can check out this beginner's guide to applique embroidery for a helpful overview of the process.
The Visual and Practical Payoff
The results of applique embroidery are genuinely hard to replicate any other way. Because the fabric grain itself contributes color, pattern, and surface character, finished pieces have a richness and dimensionality that pure thread work simply cannot match at the same scale. A fleece applique animal feels soft and tactile; a quilting cotton holiday motif carries natural print variation that makes it visually interesting up close. That textural quality is a big part of why applique has been called out as one of the top embroidery trends heading into 2026, fitting right into what trend watchers are describing as a broader appetite for handcrafted, placement-driven design.
There is also a very practical numbers argument for applique. Because the fabric handles color coverage, the machine does not need to fill large areas with dense rows of thread. Applique designs typically use somewhere in the range of 30 to 60 percent fewer stitches than an equivalent fill-stitch design covering the same area. Fewer stitches means faster stitch-out times, less thread consumed per project, and reduced wear on your machine over time. For a large back jacket design or a bold team logo, that efficiency difference is significant.
That last example is a good hint at where applique really shines. The technique is best suited to large, graphic shapes with clean silhouettes, including team logos, animal shapes, cartoon characters, and holiday motifs. It is not the right tool for highly detailed fine-line work, where thread drawing gives you more precision. Classic applique embroidery collections consistently organize designs around animals, seasonal themes, characters, and home decor for exactly this reason. The bold, recognizable shapes that make great applique are also the designs people most want to put on jackets, tote bags, kids' clothing, and team gear, which is something worth keeping in mind as you start choosing design files.
Why Applique Embroidery Is Having a Moment in 2026
If you've been paying attention to the crafting world lately, you might have noticed applique popping up everywhere, and that's no accident. TrueDigitizing's 2026 embroidery trend report officially names applique and mixed-media embroidery one of the seven biggest embroidery trends of the year. It sits right alongside oversized florals, retro Y2K typography, and metallic thread, which tells you this isn't a niche obsession. It's a mainstream movement with real momentum behind it.
A big part of that momentum comes from a shift in how buyers think about handmade goods. Etsy's 2026 seller handbook frames the current moment as the "Soft Stitch Era," describing a category-wide move toward handcrafted texture and intentional, placement-driven design. That description fits applique perfectly. When you layer a piece of fabric onto a base and frame it with stitching, you're creating exactly the kind of tactile, intentional look that today's shoppers are actively seeking out. Platforms are noticing, and so are buyers.
The numbers back this up in a big way. The global embroidery market was valued at roughly $3,712.1 million in 2025 and is forecast to reach $7,731.47 million by 2033, growing at a CAGR of 9.605%. The driving force behind that growth, according to multiple market reports, is consumer demand for personalization and customization. People want items that feel made for them, not mass-produced, and applique's bold, fabric-forward style delivers that feeling immediately.
On top of that, the embroidery machine market is projected to surpass $8.12 billion by 2035, meaning more hobbyists and small-business owners are buying computerized machines every year. More machines means more people searching for ready-to-use applique files they can load and stitch right away. Whether someone wants a custom patch on a varsity jacket, a personalized nursery decoration, or a one-of-a-kind tote bag for a gift, applique is the technique that makes those projects look professionally finished without requiring years of experience.
How Applique Digitizing Works Under the Hood
When you load an applique design file onto your embroidery machine, something interesting happens that doesn't occur with a regular embroidery file. The machine doesn't just stitch from start to finish. It stops, waits for you, and then picks up again. To understand why, you need to know how a properly digitized applique file is actually structured.
Every well-built applique file runs in three distinct sequences. The first is the placement stitch, a light single running stitch that traces the outline of your applique shape directly onto the base fabric. Think of it as the machine drawing a dotted line and saying, "Put your fabric here." It's a guide, nothing more. The second sequence is the tack-down stitch, a denser running or zigzag stitch that travels the same path again, this time gripping the applique fabric firmly to the base and holding it in place permanently. The third and final sequence is the finishing border stitch, typically a satin column or blanket stitch that runs along the edge of the applique, sealing the raw fabric edge and giving the design its clean, polished look.
Why the Machine Stops (and Why That's a Good Thing)
Here's where first-time users often get confused. After the placement stitch finishes, the machine stops completely. This isn't a malfunction or an error. It's intentional. The machine is pausing because it's programmed with color breaks between each sequence, which triggers an automatic stop. Your job at this pause is to lay your applique fabric over the placement outline, smoothing it flat inside the hoop. Once you restart, the tack-down stitch locks it down. Then the machine stops again so you can carefully remove the hoop, trim the excess fabric close to the tack-down stitches without cutting into them, and return the hoop before the finishing border runs. Skipping either step or restarting too early is the most common beginner mistake, and it usually results in a puckered, misaligned, or frayed finish.
How Applique Files Differ from Regular Embroidery Designs
If you've ever run a standard fill-stitch design, you know the machine essentially runs on autopilot from the first stitch to the last. Satin fills, tatami fills, detail stitches; all of it flows in one continuous sequence with no input from you. Applique files feel completely different because they're built around deliberate operator interaction. There's also a practical efficiency advantage worth knowing: a large applique design might use a fraction of the stitch count that a comparable solid fill design would require, saving both time and thread.
Why File Quality Matters More Than You Might Expect
Not all digitized applique files deliver equal results. A poorly digitized file might have a tack-down path that doesn't align with the placement outline, causing the fabric to shift before the border stitch runs. It might lack adequate pull compensation, which means the satin border pulls inward during stitching and leaves raw fabric edge exposed. Or the finishing stitch column might simply be too narrow to cover the trimmed edge cleanly. These aren't problems you can fix at the machine. They're baked into the file itself. Sourcing files from a reputable catalog with properly structured, professionally tested designs protects you from these frustrations before you even thread the needle.
The Next Level: Mixed-Media Applique
Once you're comfortable with the basic three-sequence structure, the technique scales beautifully. Mixed-media applique layers multiple fabrics within a single design, repeating the placement, tack-down, and finishing sequence for each layer in the correct order. You can also incorporate puff foam beneath the applique fabric to create a raised, three-dimensional surface, or combine specialty materials like felt, fleece, or quilting cotton with additional decorative thread passes on top for extra detail and texture. This is the direction the technique grows as your skills develop, and a solid introduction to applique digitizing gives you the conceptual foundation to explore all of it confidently.
Step-by-Step Workflow for Using a Downloaded Applique Design
Now that you understand how applique designs are built from the inside out, let's walk through exactly what happens when you sit down at your machine with a downloaded file ready to go. This is where the theory becomes action, and the good news is that once you've run through this sequence a couple of times, it starts to feel completely natural.
Step 1: Load and Preview Before You Touch Any Fabric
The very first thing you want to do is load your design file into your machine's software or display it on your machine's screen, and actually look at it before you cut a single thing. Confirm the stitch sequence, count the color stops, and check the finished dimensions against the area on your garment where you're planning to place it. This is also the moment to verify file format compatibility. Brother and BabyLock machines typically use .PES files, Janome machines use .JEF, and older industrial formats often run .DST. Most downloadable designs come in multiple formats, so just double-check you're loading the right one for your specific machine. Catching a size mismatch or a missing color stop at this stage costs you nothing; catching it after you've already hooped and started stitching is a much more frustrating conversation.
Step 2: Hoop Your Base Fabric with the Right Stabilizer
Stabilizer choice is one of those decisions that genuinely makes or breaks an applique project, so don't rush through it. For stretchy fabrics like knits, jersey, and fleece, reach for a cut-away stabilizer. Cut-away stays permanently in the project and continues to support the stitches through washing and wear, which is exactly what stretchy fabric needs. For stable woven fabrics like quilting cotton, denim, or canvas, a tear-away stabilizer works well and removes cleanly after you're finished. Once your stabilizer is attached, hoop your fabric so the design area is centered and the hoop is drum-tight with no rippling or slack. A loosely hooped project is one of the most common beginner mistakes, and it shows up immediately in misaligned placement stitches. The Applique Tutorial for Machine Embroidery: Start to Finish is a great resource that walks through hooping technique in detail if you want a visual reference.
Step 3: Run the Placement Stitch and Cut Your Applique Fabric
Start your machine and let it run the first stitch sequence, which is the placement stitch. This is a simple running or straight stitch that traces the outline of your applique shape directly onto your base fabric. Once the machine stops, you're going to use that stitched outline as a cutting template. Cut your applique fabric piece slightly larger than the outline, roughly a quarter inch outside the stitched line on all sides. This extra margin ensures that when the tack-down sequence runs, your applique fabric fully covers the placement outline with no gaps along the edges. For beginners, cotton fabric works wonderfully in the applique position because it's easy to cut cleanly, holds its shape, and comes in every color and print imaginable.
Step 4: Position the Fabric and Run the Tack-Down
Place your cut applique fabric piece inside the placement stitch outline, making sure it covers the stitched line on all sides. To hold it in place, you have two good options. A light spritz of temporary spray adhesive on the back of the applique fabric piece keeps things perfectly flat without any bubbling, and it's especially useful on knit projects where pins can distort the fabric. Straight pins work just as well on stable woven fabrics if you prefer not to use spray. Once your fabric is secured and lying flat, resume the machine for the tack-down sequence, which stitches a perimeter around the applique to anchor it firmly before the finishing border runs.
Step 5: Trim the Excess Fabric
When the tack-down finishes, the machine will stop and wait for you. This is your trimming moment. Using small sharp embroidery snips or a precision rotary cutter, trim the excess applique fabric as close to the tack-down stitching as possible. Keep your blade parallel to the fabric surface and work slowly around curves. Leaving bulk here creates a lumpy ridge under your satin border stitch, so clean, flush trimming is worth the extra minute it takes.
Step 6: Finish, Unhoop, and Press
Resume the machine for the finishing border and any decorative detail stitches that complete the design. Once all stitching is done, unhoop your project carefully and remove the stabilizer. Tear-away stabilizer tears away cleanly from the edges; cut-away stabilizer gets trimmed close to the stitching on the back. Finish by pressing the applique with a pressing cloth between your iron and the fabric. The pressing cloth protects both the thread and the applique fabric from direct heat, and the light steam helps set the stitches and smooth everything flat for a clean, professional result. The Classic Applique Embroidery project guide is a helpful companion reference for seeing this full sequence illustrated in a finished project context.
Choosing the Right Fabric and Stabilizer for Applique
Getting your materials right before you even touch the machine is one of those beginner moves that separates a clean finished project from a frustrating one. Fabric and stabilizer choices affect everything: how cleanly your applique piece trims, whether the satin border lays flat, and whether your base garment distorts after washing.
Best Fabrics for Applique Pieces
For the fabric you're cutting into applique shapes, tightly woven materials are your best friends. Quilting cotton is the go-to choice for most beginners because it's easy to find, comes in thousands of prints, and behaves predictably under a finishing stitch. Denim adds a rugged, textured look and barely frays at the edges. Fleece is soft, slightly stretchy, and works beautifully for cozy seasonal projects like holiday stockings or kids' sweatshirt appliques.
Felt deserves its own spotlight, especially if you're working on children's projects or character-based designs. Felt does not fray at all, which means your trimming can be a little imprecise without ruining the final look. Because the edges stay clean on their own, the machine's finishing border stitch can be lighter, and the result is a softer, flatter look that's ideal for kids' apparel and stuffed animals. If you're stitching a cartoon animal or a nursery-themed design, felt is almost always the smarter fabric choice.
Matching Stabilizer to Your Base Garment
The stabilizer goes under your base garment, not under the applique fabric itself, and choosing the wrong type is one of the most common causes of puckering and distortion. A quilting community member explained it perfectly: "if it's woven use a tear-away stabilizer, if it's knit use a cut-away like no-show mesh." That simple rule covers most situations.
Cut-away stabilizer is the correct choice for t-shirts, sweatshirts, baby onesies, and any knit or stretch fabric. It stays permanently in place after the project is done, continuing to support the stitched area through years of washing. Medium-weight tear-away works well for stable wovens like canvas bags and denim jackets. You can check out this helpful video covering 3 types of stabilizer for embroidery if you want a visual walkthrough of the differences. Fusible tear-away adds a self-adhesive surface that's useful when hooping awkward garments like jacket sleeves or items that don't sit flat in the hoop.
The Fusible Web Trick That Changes Everything
Before cutting your applique shapes, iron a strip of Heat n Bond or similar fusible web onto the back of your applique fabric. This bonds the piece directly to the base garment before the machine even starts, which virtually eliminates shifting during the tack-down stitch. Note that fusible web is not a stabilizer replacement; its job is specifically to anchor the applique piece in position, while the stabilizer underneath the base garment does the structural work.
Fabrics to Avoid
A few materials will consistently cause headaches. Loosely woven burlap-style fabrics fray aggressively and keep unraveling even after the border stitch is complete. Slippery polyester satin is beautiful but tends to shift under the tack-down stitch, creating misalignment that's hard to correct. Very thick materials like heavy canvas can cause the finishing satin border to tunnel or pucker because the thread can't wrap smoothly over the bulk; if you want to use a thicker material, look for applique files that allow you to increase underlay stitch density in the settings, which helps anchor the surface before the border runs.
Applique File Formats and Machine Compatibility
Before you download any applique design file, there's one practical detail that trips up a lot of beginners: making sure the file format actually matches your machine. Embroidery machines are not universal when it comes to file types, and using the wrong format usually means the machine simply won't read the file at all.
Here's a quick breakdown of the most common formats and the machines they belong to. PES is the native format for Brother and Babylock machines, including the popular Brother PE800 and PE900 series. If you own one of those, PES is what you want. JEF and JEF+ are Janome's formats, used across the Memory Craft and Continental series lines. SEW and CSD are associated with older Singer models, while the Singer Futura series uses FHE. For Bernina machines, including the Artista and 500 series, the format to look for is EXP. Each manufacturer developed its own format to optimize stitch data for its specific hardware, which is why mixing them up causes problems.
The one exception to the brand-specific rule is DST, the Tajima format. DST has been around since the late 1980s and has become a near-universal standard accepted by almost all commercial and semi-commercial machines. If you're working in a small studio or shared space where multiple machine brands are in use, DST is often the safest single-file solution. You can read more about how these formats compare in this complete 2025 guide to PES, DST, and compatibility.
For applique projects specifically, format compatibility matters more than it does for standard embroidery. The reason comes down to how each format stores color stops and machine pauses. With applique, your machine needs to pause at specific points so you can place your fabric before stitching continues. A PES file preserves those pause commands reliably on Brother machines. However, if you convert that same file to a different format without the right software, those pause commands can get stripped out entirely, and your machine will stitch straight through without stopping. That's a ruined project and a wasted piece of fabric.
The simplest way to avoid this is to confirm your machine's required format before you download anything. Most reputable design marketplaces, including embroiderynsewing.com, bundle multiple format options into a single download package, so you get the correct file for your machine without needing any conversion at all. That convenience alone is worth factoring in when you're choosing where to buy your designs.
If you do end up with a file in the wrong format, conversion tools can help. Ink/Stitch is a free, open-source option that works well for basic conversions. Embird and Hatch Embroidery are paid platforms with broader format support and more reliable handling of complex files. You can explore a full breakdown of formats at TrueDigitizing's embroidery file format guide. That said, always do a test stitch-out on scrap fabric after converting any applique file. Because applique designs carry embedded placement and pause commands, conversion can introduce errors that only show up once the machine is running. A quick test run takes a few minutes and can save an entire project.
The Best Design Categories for Applique Embroidery Projects
Once you understand how applique works technically, the next natural question is: what should you actually make? Some design categories are practically tailor-made for applique, and knowing which ones work best will save you a lot of trial and error as a beginner.
Sports and Team Designs
Sports designs are one of the strongest matches for applique embroidery, and the reason comes down to shape. Team logos, mascot silhouettes, and helmet graphics are bold, graphic, and built around large filled areas. Filling those areas with actual team-colored fabric rather than thousands of dense thread stitches gives you a cleaner result that sits flatter on the fabric and finishes faster. This makes applique the go-to technique for jersey decoration, fan gear, stadium bags, and youth team uniforms where you need impact at a reasonable production time. The embroiderynsewing.com sports catalog covers NFL teams, college athletics, and stadium-themed files, and many of these designs are well suited to applique execution. If you're making gear for school spirit season or a youth league, this category is worth exploring early.
Seasonal and Holiday Motifs
Seasonal designs are among the friendliest categories for beginner applique work, and the geometry explains why. Pumpkins, snowflakes, wreaths, and Easter eggs all share the same key features: clean outlines, large flat interior areas, and simple recognizable shapes that read clearly even from a distance. There's no complex shading or intricate detail to worry about, which means your placement stitch and tack-down sequence have room to breathe. Downloadable seasonal files also give you a practical crafting calendar. You can rotate fresh designs onto throw pillows, table runners, and door hangers throughout the year without needing to buy or store anything physical between seasons. Just download the next holiday's file when you're ready to stitch.
Children's Themes and Characters
Cartoon characters, animals, and anime-inspired shapes are some of the most popular applique subjects in the crafting community right now, and the design logic is straightforward. These images rely on simple, recognizable outlines and bold color blocking, which is exactly the visual language that applique excels at translating into fabric. The children's and anime design categories at embroiderynsewing.com offer ready-to-stitch files that work beautifully on backpacks, onesies, and classroom tote bags. If you're a beginner looking for a forgiving first project, a single bold animal shape on a toddler tee is a great starting point because the design does most of the visual work for you.
Fonts and Monograms
Applique lettering has a dimensional, fabric-filled quality that standard satin-column monogram fonts simply cannot replicate at large sizes. When a letter is three or four inches tall, a satin column becomes heavy and stiff; an applique version of the same letter sits lightly on the fabric and looks intentionally designed. Pairing an applique font file from embroiderynsewing.com's machine embroidery fonts collection with a coordinating motif is one of the fastest paths to personalized gifts and custom apparel. Oversized varsity-style names across a sweatshirt back, a monogrammed tote, a personalized baby blanket; all of these projects are highly giftable and come together quickly with the right file.
Nature and Oversized Florals
The oversized floral trend that's dominating 2026 embroidery aesthetics is a natural fit for applique technique, more so than almost any other current style. Large petal shapes, leafy botanical forms, and layered flower designs fill beautifully when you cut them from printed or textured quilting cotton, letting the fabric's own pattern carry visual interest that thread alone couldn't achieve. According to Printful's 2026 embroidery trend coverage, nature-inspired designs remain among the most commercially durable embroidery categories year over year. For beginners, a single oversized floral on a tote bag or pillow cover is a satisfying project that looks far more complex than it actually is to stitch.
Ready-Made Applique Downloads vs. Custom Digitizing: Which Makes Sense?
When you find a design you love and want to stitch it right now, you essentially have two paths in front of you: track down a ready-made download or commission a professional digitizer to build the file from scratch. Both options produce a working machine file, but they serve different situations, budgets, and timelines.
The custom digitizing path works like this: you submit your artwork, usually a JPG, PNG, or PDF, to a professional service. The digitizer then manually maps out every stitch sequence, fabric placement stop, and tack-down line specific to your design. Services like TrueDigitizing handle all the technical complexity for you, including fabric type considerations and multi-layer stitch planning. The tradeoff is time and money. Turnaround typically runs 24 to 72 hours, revisions may require additional back-and-forth, and per-design pricing generally falls between $15 and $50 or more depending on complexity.
The ready-made download path skips all of that friction entirely. Pre-digitized applique files from a marketplace like embroiderynsewing.com are available for instant download at impulse-friendly prices, typically in the $5 to $10 range. These files are already tested, already formatted for the most popular home machine brands, and ready to stitch the same afternoon you discover them. No emails, no waiting, no revision rounds.
So when does custom digitizing actually make sense? It earns its premium when your project involves a proprietary logo with legal restrictions, a specific person's likeness requiring approval, or a highly complex multi-layer design that simply does not exist anywhere in ready-made catalogs. Corporate branded merchandise and licensed imagery fall into this category.
For most hobbyists though, ready-made downloads win clearly. Sports mascots, holiday motifs, children's characters, nature themes, and monograms are already represented in broad catalogs with proven stitch quality. The practical economics drive this home simply: four projects a month using ready-made files at $5 to $10 each costs you $20 to $40. The same four projects through custom digitizing runs $60 to $200 while also adding days of wait time and revision risk. For anyone running multiple projects monthly, that difference compounds fast and understanding the difference between standard digitizing and applique digitizing makes it easier to recognize exactly which path fits your specific project before you spend a single dollar.
Picking the Right Applique Complexity for Your Skill Level
Not every applique design file is created equal, and choosing one that matches where you actually are in your skills right now makes a huge difference in how that first (or fifth) project turns out.
Beginner-Friendly Files: Keep It Simple
A beginner-friendly applique file has a few clear characteristics. It uses a single fabric piece with a clean outline, think geometric shapes, simple cartoon characters, or bold letters with no fussy interior cutouts. The stitch sequence follows the classic three-step structure: a placement stitch that shows you exactly where to lay your fabric, a tack-down stitch that locks it firmly to the base, and a finishing border stitch (usually satin or bean stitch) that covers the trimmed edge neatly. Finished sizes between 3 and 6 inches are ideal at this stage because trimming excess fabric close to the tack-down line is manageable, and hoop handling stays straightforward. If you want to see this sequence in action before you start, this beginner applique tutorial from Ricoma TV walks through the whole process clearly.
Intermediate Files: Layers and Mixed Media
Once the three-step sequence feels natural, intermediate files introduce two or more fabric layers placed in sequence, meaning you stitch, trim, add the next fabric, stitch, and trim again. Mixed-media files push things further by combining a standard applique fabric center with elements like puff foam inserts or metallic thread detailing around the edges. These combinations are very much on-trend heading into 2026, with 3D puff and metallic thread both named as major embroidery trends this year. Precision trimming between sequences becomes critical here because a sloppy cut on layer one affects how every later layer sits.
Fabric Pairing and the Test Swatch Rule
For your first few projects, pair felt applique pieces with a stable woven base like a canvas tote bag or a denim jacket. Felt does not fray, so trimming is forgiving, and woven bases hold their shape under hoop tension without distortion. Stretchy knits add too many variables at the beginner stage; save those for when the three-step sequence is second nature. Before committing any design to a final garment, regardless of your experience level, run a test swatch on matching scrap fabric first. Check that your fabric piece lands squarely inside the placement stitch outline and that the finishing border fully covers the trimmed edge with no fraying peeking through. That one extra step saves a lot of regret.
Start Your First Applique Project Today
Applique embroidery gives you faster stitch-outs, lower thread consumption, bolder visuals, and that satisfying tactile texture that flat fill-stitch designs simply cannot replicate. Those advantages make it one of the smartest techniques a beginner can learn first, and the good news is that getting started is genuinely straightforward. Download a beginner-friendly single-layer applique file in your machine's native format, pair quilting cotton with a cut-away stabilizer, and always run a test swatch on scrap fabric before committing to your actual project. That one test run saves a lot of frustration.
When you are ready to browse designs, embroiderynsewing.com has a broad catalog of ready-to-stitch applique-compatible files spanning sports, seasonal, children's, anime, and nature categories. Everything is available as an instant download in multiple machine formats, so you can grab a file and be stitching within minutes.
Once you have your first project finished, there is plenty more to explore. Oversized florals, metallic thread designs, and retro Y2K typography are all rising 2026 embroidery trends that pair beautifully with applique techniques, and each one is worth its own deep dive as your skills grow.
Conclusion
Applique embroidery is more accessible than most beginners expect, and now you have everything you need to get started with confidence. You have learned how the layering technique works, which file formats your machine relies on, and how to build a clean, repeatable workflow from design to finished stitch.
The most important takeaways are simple: choose the right files, prepare your materials carefully, and trust the process one step at a time. Every expert applique artist started exactly where you are right now.
Ready to bring your first design to life? Pull out a piece of fabric, load up your machine, and start small. A single project will teach you more than any guide ever could. The most beautiful work comes from people who were willing to begin, so make today that day.


